This is my fitness related blog. I created this on the day I start training for my first marathon, just a few weeks short of a year after I found myself in the worst shape of my life. Something had to change. Me. So I did. And I am. I want to see what this 1974 vintage body is capable of. Hence, my Mantra (courtesy of Tool): Push the envelope. Watch it Bend.
Well, not really. Anyone who knows me will immediately refute the notion that I'm ever quiet. But I very obviously abandoned blogging with any degree of regularity after The Marathon. Maybe we'll do that again. Maybe not. These days, where I've swapped the abdominal 6-pack for the one you get in the adult beverage isle at the supermarket, it's not in the foreseeable future.
#SpoilerAlert This is no longer a fitness blog.
But, for the same reason I started this back in 2011 (I'll have to go back and check that, but I think it was 2011), I need a bit of accountability to focus me from the SQUIRREL! distractions that plague the ADD afflicted.
Anyone who's gracious enough to be following this blog also follows me elsewhere on social media and knows that I make stuff. Wood Stuff. Guitars. Mandolins. Ukuleles. Coasters. (yeah, that last one's not so wowing, but way more practical). I'm also a cheap-ass, Scottish-heritage guy who couldn't turn down a price "oops!" from stewmac.com on a Les Paul Jr. guitar kit (or two). Cheap enough that I was willing to risk turning a purchase into firewood for the chance at making a $300 kit (on sale for $150 (on "price-oops" close-out for, FREE, given that a $75 finishing kits was included)) awesome.
Okay, you don't care about the deal. I get it. That's not the point. I was halfway into potentially ruining this perfectly good guitar kit with power tools when Laura hollers down in the basement that Kobe Bryant died in a helicopter crash.
Well... Damn.
I grew up with Jordan. I will stubbornly argue that will never be another Jordan. No offense to Lebron, but Kobe is about as close you're going to get to that benchmark of "our" generation. Regardless of your opinion in the sport and his position in its royals, it was too soon for him to die.
So today, my next guitar has a name and Kobe is going to be fantastic.
Of everything that goes into an Electric Guitar,
the component that ultimately gives the instrument its voice is the pickups.
The controls (volume/tone, switches), strings, construction, and amp (as well
as the musician) all matter to different extents, but for the guitar itself,
the pickups are where, “You get what you pay for,” truly comes into play in the
marketplace. One of the reasons I wanted
to take on the project was to see if I could actually make my own pickups. As
the perpetual scientist, the idea that I could potentially turn out a set of
custom-wound pickups for my Strat (or Tele… or LP Jr… or Firebird… or, well,
you get the drift!), and then make a change and wind another set, maybe using
alnico II instead of alnico V slugs, winding with vintage-spec wire vs. modern
spec, winding with 43 gauge vs. 42 gauge, 10% over/under winding, etc. etc.
etc. is stupefyingly attractive.
Part of my learning process is getting to
understand as much as possible of the HOW with regard to the construction and
electronics. Beyond the very basics of
electronics, I am out of my element. People considerably smarter than me
figured this all out long, long ago and I’m not going to start reinventing the
wheel, but I hope to learn enough to be able to make informed decisions about
my pickups. At a very high level, a guitar pickup is made from a fiber (or, in
cheap guitars, plastic) base & top (called the flatwork) through which metal
slugs (called poles) are inserted to make a bobbin about ¾” tall and 2 ½” wide.
The tops of these poles are what you see when poking out of the top of an
electric guitar. In most cases, there is a cosmetic plastic cover with holes
for the poles that covers the flatwork. To turn the bobbin into a pickup, there
is nearly a mile (4000’) of extremely fine gauge wire (42 or 43 AWG, about the
size of a human hair) wrapped around and around and around the bobbin somewhere
in the neighborhood of 8000 times.
Typically when you’re wiring something small &
local, you can use a multimeter to check for resistance (ohms) on the line. In
most circuits that are simply a point-to-point wire (like running a line from you’re
Home Theatre Receiver to a speaker at the back of the room), the speaker wire
is relatively big and the run is short, giving a resistance very close to zero.
Pickups, on the other hand, are a very fine gauge wire run for an extremely
long distance. On this scale, the resistance is measurable and for a single-coil
(one wound bobbin) pickup like you see in a Stratocaster (or Telecaster) has a
measurable resistance of about 6-7 thousand ohms. This is a meaningless number
to the lay person, but the resistance of the pickup is one of the key factors
influencing its tonal qualities.
Having a really long wire wrapped around the poles
doesn’t do anything… until the poles are magnetized. Once the pole pieces are
energized to become magnetized, all the components necessary to make noise are
in place. This is the point for me where ‘science’ becomes ‘magic.’ Plucking an
electric guitar string over a pickup causes a disturbance in the magnetic field
of the pickup which is picked up by the windings, transmitted through the
controls and eventually to the amplifier and voila! Sound! (or magic).
Awful, horrible Strat-copy body that's barely worthy of being gutted
My project guitar won’t be ready for electronics
for several months. I expect there’s going to be some trial & error in the
whole winding process. If it turns out that I really CAN’T make it work, I’d
like to know now so that I can start budgeting for pickups (and likely
significantly altering the long-term guitar building plan). My plan for the next few months is to see if
I can snag a cheap ($20) Squire (or similar) Strat-style guitar as a test bed
and try my hand at winding a few pickguards worth of pickups using a few
different options, both to experiment with the tonal differences as well as
seeing if I can actually make something that sounds good.
I also have a “Standard” Strat that I bought a
decade ago. I swapped out the stock bottom-tier electronics with what
(according to the eBay listing) were some pretty solid Fender Custom Shop Texas
Specials. At the very least, they sounded considerably better (and I now have
the tools & knowledge to actually make a reasonable assessment if that’s actually
what they are!) That entire pickguard assembly is going to stay intact. It
sounds great and there’s no reason to mess with it! That said, what I have really always wanted
is a Strat with pickups that come as close as possible to Mark Knopfler’s Red
strat that he played on the early Dire Straits albums. Based on some basic
research, it’s likely that the pickups are from a Strat made somewhere between
1957 and 1962. So my interim project is to
-Strip the neck pickups out of the Standard
Strat’s pickguard that’s in the basement, rip it apart, and try to rebuild it
to roughly the same spec as the middle pickup and see how they compare
(understanding that there is some difference solely based on the position of
the position of the pickup)
-If the neck pickup works, try a repeat on
another, possibly making a change in the wire or magnets.
-If the middle pickup works, I’ll try something
different with the bridge, possibly either an underwind to (hopefully)
accentuate the bark of the treble *or* overwind to (hopefully) reign in the
quackiness of the Strat bridge pickup and round out the tone a little more.
Les Paul Jr. Template over a Cherry/book-matched-Maple/Cherry body
Once I finish the rebuild of the Standard
Strat pickguard, the next step is to move on to lovingly build a set of replica
’59 Fender Strat Vintage pickups and a new pickguard before moving on to wind
the pickups for the Telecaster and the Les Paul Jr. project that I’ve started.
Of course, then I’ll have one or two more pickguards than I
have Strats. Whatever shall I do then…
One of the challenges of building a guitar from the
ground up is that there are many, many opportunities to make one small mistake
that turns many hour s of work on an instrument into many hours of work on firewood. Building and shaping the outline of the body
has been an exciting and enjoyable process, but it’s also the one part with a
HUGE margin of error. I could cut one of the horns off and bore a 2” hole n
ear
the tail and it wouldn’t make a bit of difference in how it sounds through the
amp when it’s done. But if the neck pocket is too big, the neck joint will be
sloppy. If I carve too much of the neck, it may not hold up to the tension of
being strung. There are some things like
this where there is literally one shot to get it right and I really don’t want
my first time doing some of these things to be with the wood that SHOULD be the
final piece.
This project started out on a recommendation from
one of my mentors to NOT use top-quality lumber for the first pass, but to take
my first run using a cheaper hardwood, such as Poplar (which I did). Taking
that to the next step, even though my $13 Poplar body isn’t made from Walnut or
Mahogany or something ridiculously expensive, I have quite a few hours into
taking it from a slab to a guitar body and I’d rather play it around a bonfire
this summer than fuel the bonfire with it.
So I made a decision to hack together some pine boards and make an
initial pass as constructing the neck and machining the pockets for the
pickups, control cavity, and neck pocket.
Gluing and Clamping the pine neck.
Starting with the neck was relatively easy. I had
a length of 2x2 in the garage that, with a little bit of effort, was cut in
half and joined together to make a neck-width and neck-length hunk of
wood. Cutting the outline without a
bandsaw was a pain, even using the same drill-press/coping-saw method I used on
the body, but it was relatively uneventful.
The board wasn’t really wide enough to support doing the headstock I
wanted (either Reverse Firebird or a Reversed Telecaster), but I got enough for
a reasonable look. Since I’m shooting
for a 50s vintage Telecaster, I figured I’d shoot for a neck that would be from
that era. I found this awesome picture
online of a 52’ Telecaster “Boatneck” that seemed like a good place to start
and a pretty simple shape. Here’s the
problem. I have a “1st Fret” profile and, with a little manipulation
in Photoshop, a 12th Fret profile (the neck gets wider as it moves
from the nut/tuners toward the bridge/pickups).
1st fret and 24th fret profiles (green arc) for the prototype neck.
Rough outline, half-shaped.
But what do I actually DO with this? I can’t chop
the headstock and heel off to trace the profile and I can’t make a sanding jig
since the profile changes as you move down the neck. About all you can do is mark the depth of the
vertical from the fretboard (basically the bottom of word “Reissue” in the
images, above), cut the neck to a its depth (taking into account the fretboard
thickness), and just start hacking away at the edges with rough wood working
tools to get down to the point where finer & finer tools can be used to
smooth the neck to a general profile.
The nice thing about working with pine is that this went very
quickly. The lousy thing about working
with pine is that it’s SO soft that it rips and tears easily, but it does offer
a lesson in taking the time to do the work at the pace the wood wants to work
at and not try to force the pace.
Drawn outlines of cavities.
The next step was to do some test work with a set
of Forstner bits to see if I could reasonably do the body “routing” with a
drill press. (Ed. note: How is it that no one has ever told me that I need a
set of Forstner bits? I CLEARLY do, but for this project I am content to borrow
the set my father lent me. Next I expect you people will be telling me that I
need a plunge router…). The most direct
work was the Control Cavity. 1” Forstner
+ Chisel made short work of getting the pocket done (to a somewhat random
depth). Lesson #2 learned is that my
small drill press is NOT going to be deep enough to do this project on my
equipment. I was able to complete the body
work with my 18v Ryobi hand drill, but it was definitely not clean. The Bridge pickup was connected via a 12”
long x ¼” drill bit, angled from the pickup to the control cavity. The neck pickup will either be drilled from
the neck pocket down to the bridge or routed under the pickguard and drilled
into the control cavity. The jack will
be Fortner-drilled and covered with a cover plate.
"Finished" Pine guitar (or the most work ever put into a piece of firewood).
I
definitely went into the Pine Neck project with a lot of questions and came out
with a quite a few answers, or at least directions. The Pine Body project was
more straight-forward and there was less figuring out to do. Coming out of this exercise, the key pieces
of learning is that the neck is likely going to be the part of the project
where I can’t realistically get a quality product with the tools at my
disposal, so I’ll be spending time down with my mentors making the neck. I’ll also need to do the bulk of the body
routing/drilling work there as well.
Although I could easily do the cavity drilling with the Ryobi, getting
the neck pocket right is going to be a critical part of the construction and
something that would be unwise to attempt myself.
My typical approach to, um, just about everything, is to figure out what, “Acceptable,” is and then go a level or three beyond that. Especially when it comes to anything that’s manufactured, there is more junk than ever in the marketplace. At least in America, people seem to be willing to trade cheap-in-price for poor workmanship and product longevity. Yes, that widget was only $9.37 at Wal*Mart, but the $18.99 one you put down probably would have lasted until you died, but you’ll be back at Wal*Mart in another 2-4 years to replace that cheap widget (after griping for those 2-4 years about how lousy it was). There are few things in this world that don’t abide by the saying, “You get what you pay for,” at least at the middle-class level. There is an obvious leveling of the QPR (Quality:Price Ratio) as you approach Luxury items, but as a general rule for the 99% who are reading this, buying up a level (or three) of quality is a wise, long-term investment.
Having said that, one of my challenges for this project was to keep the budget minimal. As much as I would love to drop 18:1 Gold Grover Rotomatic tuners ($160ish), Vintage Fralin pickups ($200ish), an acoustic-enabled bridge (another easy $200), and any number of other high-end parts, I don’t have remotely close to the budget to bleed $800 toward one instrument, let alone whatever the costs would be for the 3-4 I intend to have either built or participated in the build of at the end of this year. So what to do?
I have been using a combination of Stewart-MacDonald and Allparts as my baseline source for parts to get an idea of what the common luthier has access to get a ballpark idea for brands, styles, and prices. Predictably, eBay has been an extremely good source of (so far) quality parts at excellent prices. In several cases, I’ve been able to purchase directly from an American small business and have correspondence with the proprietor about my project and get some sage advice for incorporating their product into my design.
Another somewhat unlikely source for parts comes from Craigslist and Freecycle. I have acquired two acoustic guitars from Freecycle.
One is a Jasmine (Takamine’s entry-level) ¾ sized Classical Style guitar that had a snapped headstock (which I easily, if crudely, glued back together to make a perfectly playable instrument). This gives the girls something they can play with as they graduate from the awful kids guitar I bought them a few years ago.Cost to me: $0.00
The other is so poorly made (or refurbished) that there are no identifying marks on it. The value point here is potentially some tuners for the Ukulele project and a truss rod for a guitar neck later on.There may be some use for the back as the top of a Ukulele, but everything else is so bottom-drawer that the value with this guitar will be solely tearing it apart to see how an Acoustic is put together. Cost to me: $0.00
Blank Headstock
A very unusual adjustable
acoustic saddle/bridge.
Likely will cut one tuner off each
side and use the tuners on a Uke.
Quality abounds! Laminate top and a gorgeous ebony paint job on a clearly-not-ebony fretboard.
No markings inside the guitar either. Must be the company that made it didn't want to be identified!\
...and why not a painted saddle, too? Lifting off the soundboard, too.
I don't think there's enough adjustment in the screws to compensate for that!
My best find to date has been a Craigslist purchase on my last Anaheim trip. I found someone offering a pretty thoroughly thrashed Ibanez electric guitar for $50. The neck was broken, the electronics were compromised, and the body was pretty well beaten up. I offered $20, he countered with $30. When we met to swap cash for product, we started chatting and it turned out he had a project idea for the body (which was essentially useless to me) and my main want was the tuners. So we took the neck off, I gave him $15, and walked away with 6 tuners, a fretted Rosewood fretboard, a truss rod, and a template for the neck pocket & heel (somewhere in the neighborhood of $80- $100 in project materials). The extra bonus of getting a broken neck is that the whole thing easily came apart and fit in the suitcase for the trip home!
Yeah, that's going to affect the playability.
The fretboard was clearly glued down, but I'm pretty sure
the headstock-to-neck joint was simply a pressure-fit.
Note: There will be a handful of posts coming to catch up on the project. Rather than blurt them all out at once, I'll post one every few days until the blog is caught up with the project (at which point I'll go back to neglecting my readers).
The PROPER way to cut a body from a block of wood
is to use a band-saw. I don’t have one
of those, so Plan A was, “Use a coping saw to cut the perimeter of the
Telecaster.” Plan A was stupid and lasted about 2” into the process.
Not only would it have taken an insane amount of time, a coping saw (at least the one I have) is not intended to cut through and inch and half of hardwood and was making wandering cuts as the blade flexed trying to get through the block. After sawing in to the outline, I realized I need to make about a 45 degree turn to start cutting the perimeter. The problem was that the saw/blade really did NOT want to make that turn, so I decided I’d drill a hole that would allow me to easily turn the blade and get on the right line. What started as a way to make the turn from cutting in to the guitar to cutting the perimeter became the primary “cutting” process for the perimeter. The drill press not only ensured I stayed on track around the perimeter, but it also kept the sides perfectly vertical, something that was NOT going to happen with the coping saw.
Starting to cut the perimeter.
Most of the way cut out!
One of the first cast-off pieces.
Coping saw work complete.
Very rough edge to start with.
From the VERY rough outline, I used a rough wood rasp to get down close to the final dimension and then used a home-made drum sander in the drill press to give most the guitar its final smoothed shape. A little bit of work remains in the tighter spaces that I couldn't reach with the larger-radius drum sander, but those can be hit either with a dremel, hand-sanded, or sanded with a smaller drum.
Glue & clamp some 60-grit on and VOILA! A sanding drum!
Homemade sanding drum using disks cut with a hole saw, a length of threaded rod, and a few washers & bolts (all things just lying around in the workshop).
I've realized that approach to this Telecaster project is very similar to my approach to brewing beer. When I brew, I always have a lofty vision of what I want from the final product. However, there a lot of things that can go wrong on Brew Day (and beyond) that affect the final product, often in a less-than-desired way. So when I start a new brew, my A#1 goal is "make drinkable beer." Goal #2 is, "make a beer I want to drink." Somewhere further down the line is, "Final Product = Perfect Realization of Vision." Lofty goals are great to have, but there something to be said for being able to be satisfied with a less-than-perfect outcome.
With the idea that this guitar build is a "learning project," my primary "build a guitar" goal (other than to learn so that the next project is better) is to keep the expense as low as possible. A lot can be learned without spending a mint. The secondary goal is having a playable instrument. I know I have the ability to make a great sounding, great playing electric guitar using parts someone else made (I've made two so far), but I really don't know what goes in to the whole process of making/routing the body or winding the pickups. The more you can do/make yourself, the more the final product is your own and the more you learn about how it's really made.
I got my first glimpse at reality when I took the rough hunk of Poplar into the cellar and started working with it. I haven't done a lot of wood working, but I've done enough to know that working with power tools is a lot like approaching a strange dog. As much as you might be a little bit afraid, you need to be bold, confident and decisive, yet fluid in your actions. Being jumpy and tentative typically doesn't end well in either case.
The workup on the hunk of Poplar went down like this:
cut the 36" length into two 18" lengths.
With the crown up, trim about 1/4" off one side to get a flat edge.
Flip the board around and cut the other length to get a total board width of 7" (finished width needs to be 6 3/8")
Now that I have [what should be] two parallel surfaces, I stood the board on its edge, cranked the table saw up to its 3" max height and ripped the length of the board, flipped it, and ran it again leaving about a 1" piece in the middle to saw by hand. This was the potential dog-bite moment. The table saw I have really isn't powerful enough for what I was asking of it (I tripped its internal breaker twice and had to shut the saw down mid-cut on each pass as the blade started binding), so there was an element of unpredictability as the wood was being fed into the blade. It definitely didn't go perfectly, but it did what it needed to do!
The finished product was definitely rough and I wasted a good 1/4" of material with my method vs. the preferred "take it the luthiers' shop and run it through the band saw" approach. The table saw work took a while, but it worked. The hand sawing of the remaining wood strip in the middle took a while as well, but probably no more than 10-15 minutes per piece.
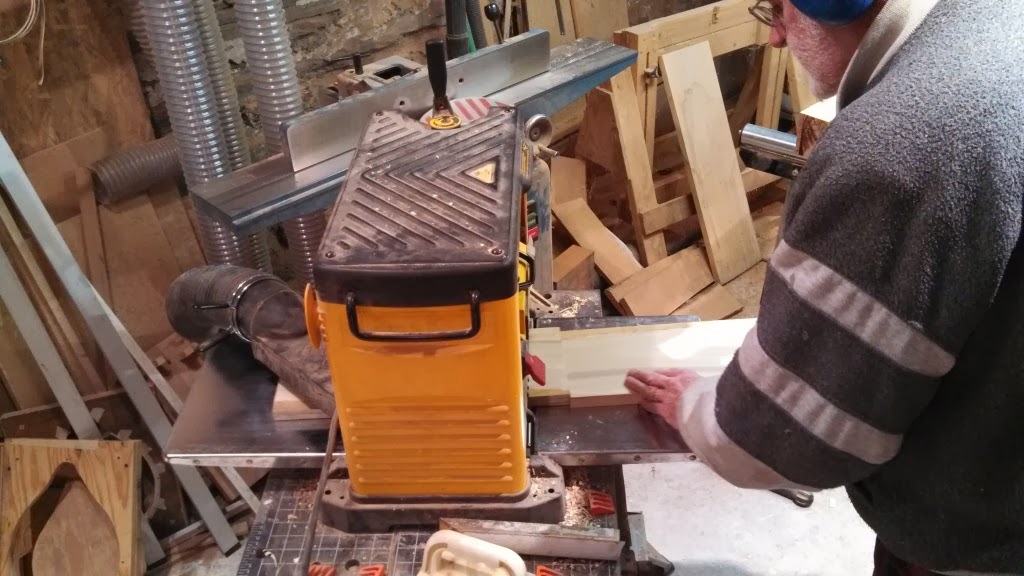
The next step for the body was a trip to the Ennis & Lubold workshop in Randolph to make the rough-cut, crowned pieces into perfect rectangles in profile so that they could be glued into a solid guitar-sized block. The first step was to run the boards through a wide surface planer. This removed all of the junk left over from the division of the board and stripped away the crowning of the wood. A similar process was done on the edges to ensure that the edges were perfectly straight for a flush glue joint. After some hemming and hawing about how to put the pieces together, the sides were matched glued. Once they had set, they were then glued together to each other resulting in a pretty striking (for a $13 chunk of Poplar) bookmatched pattern.
Planing the rough boards.
Applying the glue.
Clamping the sides.
Gluing & clamping the sides together to make the raw materials for the guitar body.
I've started, but not finished, a few blog entries since my last post at the end of 2012. For the past several years, each January started with me laying out some personal fitness goals, whether it be a Marathon (2011), the Spartan Beast (2012), or trying a ketogenic diet for the 2013 Spartan Beast and Leaf Peepers Half Marathon.
For 2014, I really didn't feel compelled to tackle any new major fitness challenges. I'm getting a little burned out from having my foot on the gas for the past 4 years. Health and fitness won't go away, but I'm not planning to TRAIN for anything major in 2014.
So, much like I used this space to record my path to my first (and so far, only) marathon, I'm going to shift gears in the TOPIC of this blog, but still attempt to maintain the "Push the Envelope. Watch it Bend." philosophy. I have decided to build, from the ground up, a Telecaster (electric guitar). Some portions, such as building and fretting the neck, will require assistance of friends & family (namely Ennis & Lubold Luthiers), but as much as possible I'm going to use tools I have on-hand to turn some raw hunks of wood into a playable instrument at least equal to the tonal quality and playablity level of a mid-level, factory-made Fender. I will do all the wiring myself to the extent that I intend to build and wind my own pick-ups (including building my own pick-up winder).
There will certainly be mistakes made along the way. I have limited experience working with wood, so there will be a lot of learning happening in a short period of time. I have built from off-the-shelf parts, wired, and lacquered two electric guitars, and learned a LOT in the process of doing that. There will be another partnership-project with Ennis & Lubold that I'll announce soon that will allow my to cut my teeth on an acoustic-instrument project in parallel with the Telecaster.
The Tele project started this afternoon with the $13.80 purchase of a 2" x 8" x 36" block of Poplar that will be cut into two 18" pieces, then cut along the long edge to have a bookmatched top & back. The Poplar isn't beautifully figured and the easy way out would be to just join the 18" blocks, but where's the fun in that? Even though I fully expect to finish the guitar in paint (vs. stained/natural), a large part of this project is LEARNING, so right outta the gate I'm going to learn how to (or how NOT to) bookmatch a solid-body guitar.
Ditch jumps -- several of 'em filled with water/mud, about 4-5' wide.
<unnamed obstacle> -- crawling under some heavy screening. This is where I bent my right thumb backwards and sprained the bejeezus out of it. Yes, less than 15 minutes into the race, I hurt myself.
Over unders -- climb over a few 6' walls, through a gap in the walls, and under the walls.
Dirt mounds w/ water pits -- more dirt/mud/water.
Vertical cargo -- climb over a 10' tall cargo net that was pretty freely rigged/swinging at the top.
Barbed wire high crawl -- strung about 4.5' off the ground for 100' or so in the middle of a single-track trail in the woods.
Double 7 foot walls -- Simple as it sounds; two walls to get over.
Barbed wire crawl #1 -- This should count as two obstacles since you crawled through probably 10 yards of gravel/rock/mud under barbed wire strung about 18" off the ground to a berm which you crested only to see a muddier & rockier 10 yards of the same in front of you. Did I mention they were spraying water over this obstacle.
2 short walls -- these came within the first 3 miles and were about 6' tall and pretty easily navigated.
Monkey bars -- Just like it sounds, maybe 15' of monkey bars to get through. Saw quite a few burpees done here as the penalty for those who couldn't do it.
Trench crawl - waist-deep water in a 5' deep trench with barbed wire strung overhead. More of a squat-walk than a crawl.
Traverse wall -- 15' of lateral movement on a wall with awkwardly placed blocks for hands and feet. Participants were required to get from one end to the other like a rock climber using only the blocks.
Rope climb #1 -- Wade into a 2' deep pool of water and climb a rope about 15' up to ring a bell, then descend. Lots of burpees seen here, too, and a few impressive back-flops from dudes who got about 10' up before losing it.
40° water swim -- this & the next one go together and represent the only obstacle I did not attempt. I am a very poor swimmer on a good day. The Racer's Guide said they would have PFDs on the shore for those who were poor swimmers. They didn't have on shore when I got there, so I burpeed out.
Tarzan swing -- After swimming maybe 200' in 41° F water, you climbed a rope ladder about 10', and then were expected to swing from rope-to-rope for about 10' (5-6 ropes), ring a bell, drop into the water, and swim 200' to shore. If you failed, you swam about 300' to the opposite shore to do burpees. I didn't hear a lot of bell-ringing here!
Water station -- AKA Lemonade Stand. No obstacle, just a re-hydration point. This was about the 4 mile point.
Memorization poster -- Based on the last 2 digits of your bib, you were given a number/phrase to memorize with the expectation you'd have to recite it later. My phrase was India-950-7200. Yes, I remembered it. :)
Herculean hoist - Rope attached to a pulley with a heavy concrete weight on the end (60#?). Pull the rope until the knot hit the pulley about 10' up and return it to the ground under control.
Water station #2 (6 miles) -- covered about 2 miles with only one obstacle. All trail running/hiking with not a lot of elevation change.
Atlas carry (concrete bucket thing) -- basically they mixed up an 80# bag of concrete in a bucket, let it set, then removed it from the bucket to create an awkward 90# weight. Pick one up, carry it 50', put it down, pick up another one and carry it back to the start.
Barbed wire crawl #2 -- similar to the first crawl except this one wasn't as rocky, but was uphill. I think they just wanted you muddy again.
Double 7 foot wall #2 -- more walls to get over.
Wall climbs w/rope -- These walls were made of big logs with ropes hanging down. You had to grab the rope and use both arms & legs to get up & over these walls.
Tractor pull -- This was about a 30# concrete block attached to a chain. Drag it uphill for about 20 yards, then back the starting point.
Sandbag carry -- There was a pretty long mostly-downhill hike to get from the Tractor Pull to the Sandbag carry. The sandbags were 50-60# sand filled disks that you had to carry up (and, of course, down) an increasingly steep slope.
Memorization test -- About 5 miles and 2 hours after viewing the Memorization Poster, you had to give your bib # and phrase/number. India-950-7200. PASS!
Sled pull -- The bolted a wooden basket on a pair of skis and put a bucket full of rocks in the basket. They had a nice little 50 yard oval marked off that you dragged the sled around. The first half was remarkably easier than the second!
Water station #3 (10 miles) -- final hydration point.
Tyrolean traverse (and swim) -- At least they had the life jackets at this one! Rope strung over a pond. Traverse 50' (either on top of or hanging beneath) on the rope, ring a bell, drop into the water, swim (or get a ride from the nice lady in they kayak who sees you with a life vest and takes pity on you) to shore. Other than the "Swim/Tarzan Swing" obstacle which looks like the hardest one on the course, this was the most challenging one for me.
Giant dirt mounds with water -- Somehow I had the energy to make the jump across the mudpits for most of these. They'd basically dug 2' deep trenches and piled that + more dirt up to make the mounds & filled the trenches with water (which became mud).
The original list did not have this as an obstacle, but there was about a mile of single-track, over boulders, through the woods bushwhacking up this ridiculously steep mountain slope. This took a LONG TIME because there was little opportunity to get around people who were slower and there were a number of bottlenecks on the trail where progress just ground to a halt and large queues formed.
Rope climb #2 -- similar to the first rope climb, but not as high and climbing out of hay bales, not water (yay!)
Vertical cargo net #2 -- You turn the corner on what you think it the high-point of the mountain only to see that they've managed to string a cargo net over a 10' rock face that you need to ascend.
Double 8 foot wall #3 -- As if you haven't climbed enough (2 miles of straight-up since the Mile 10 water station), they throw a few more walls at you (and taller ones).
Hobie hop -- after about a mile straight down the mountain (about half of which is on more muddy single-track "trail" in the forest) they make you put an elastic band around your ankles and hop over logs and crawl under ropes.
Spear throw -- after about another 10-15 minutes of light hiking on a much smoother grade, you come to the last few obstacles. The throw-a-spear-in-a-haybale is the only obstacle of all of these that I attempted and failed. The spear had to stick in the haybale and, while my aim and velocity was good, my form put enough of a twist on the spear that it wasn't going straight enough to stick. No food for Grok tonight. 30 burpees were my penalty.
Barbed wire crawl #3 -- short crawl under barbed wire on gravel. No rocks. No water. No mud.
Slippery wall -- ...and now a mud pit in front of a 45° wall (coated in slippery mud) with a rope. Git yourself over the wall.
Fire jump -- once over the wall, you run through a path of pyres and jump over a small bonfire at the end...
Gladiators -- and the run through the finish line and try not to get mauled by the buff dudes with pugil sticks.
FINISH! Get Medal, get banana, get shirt, get beer, get shower (in that order).
As the 2012 London Olympics come to a close, I wanted to jot down a quick post about some thoughts that have come up in the past few weeks.
1) How awesome were our American Women? 29 of our 46 gold medals came from women this Olympics.
2) We need a Women's MLS league in America and we need to do better at supporting a professional level of women's sport in general. There are too many potentially good role models for young girls to only showcase them once every 4 years. Girls of my generation grew up idolizing Jordan and wanting to, "Be Like Mike." I want my girls to grow up knowing the names Rapinoe, Morgan, and Wambach. If they choose a not sporty path, that's fine, but dammit I want them to have the option!
3) More on topic with my recent rambling is that all the hoopla about Michael Phelps being the, "Best. Athlete. Ever." started bringing some focus to the topic I've been struggling with of Health vs. Fitness. Six months ago, if you asked me about the relationship between the two, I'd probably have said that they had a mostly parallel track, meaning that as you increased your fitness, you became healthier. Today, I don't think that's necessarily the case and Phelps (or any number of other Olympic or Professional athletes) kinda helped clear the fog in my thought process.
Few would argue that Usain Bolt or Michael Phelps weren't in phenomenal shape. Each man is literally more fit that billions of other men. The same applies to Allyson Felix or Missy Franklin with regard to women. But are they healthy and should we strive to be like them? I found myself wondering what horrible, unnatural things must they do to themselves to be able to perform at that level? Humans were not designed to train with such a singular focus to run 100m in under 10 seconds or to swim that same 100m distance in under a minute.
Granted, I'm not even a decent amateur caliber athlete, but I know the toll it takes on my body to be remarkably mediocre. I've never done any real recreational "off-roading" in terms of dietary/training supplements or dietary wonkiness, but a quick look at professional cycling (or baseball... or football... or track...) will return a laundry list of top-level athletes busted for migrating too far out of the grey area of legal supplement into the land of performance-enhancing substances. It's a safe assumption that to play at the top, you need to understand where that line is and get as close to it as possible without crossing the boundary -- if you don't, you can be certain your opponent is.
How healthy can that possibly be? Sure, many professional athletes have physiques envied by billions, but at what cost? How many retired NFL players appear "healthy" a decade after they've left the game? Many, if not most, have chronic ailments that prevent them from living a normal life. Some of that is due to the abuse of the game. Even in the case of Phelps, what the hell does it do a human's system to ingest 4-5 times the normal amount of food that a normal person requires?
What are we, the Normal Folk, doing to ourselves in our attempts to get as close to that Ideal Form as possible? We weren't built for the constant abuse we put ourselves through trying to look better, be faster, and get stronger. It's only our own arrogance in the Superiority of Humanity that convinces us that we are somehow significantly different than the dude chillaxing with his homies around the campfire 20,000 years ago. What I'm coming to believe is that we're not, and that chasing the dream of any PR fitness goal I might have, whether it be a 3:30 Marathon, 1:30 Half, or a 300# squat will not be evidence of my increased level of health, but can only come at its expense.
* Bonus points to anyone who makes the connection between the Blog Title and its content. Your prize is the sad confirmation that you're old.
What if everything you've been told about nutrition, health, and fitness was wrong? And not just marginally wrong, but almost the polar opposite of what was right? Spoiler alert: maybe it's not. But what if it is? Hear me out.
The goal I undertook just over 2 years ago was to stop being a sod and get myself into shape, not just for me and not just for my amazing wife (who had already successfully unsodden herself). I wanted to set a proper example for my then-infant girls. I wanted to set an example of being healthy and active with the hope that they might avoid the plight of the average American who finds themselves inactive, overweight, and unhealthy.
At the time the conventional wisdom was that I needed whip myself into shape with cardio, crank out hours in the gym every week, and support that activity with a whole-grain fueled low-fat diet. As is the case for many (but certainly not all and many not even most), when I stuck to that plan, I saw pretty solid results. I was blessed with something genetically that kept me from getting fat, so I didn't have weight to lose, but I was certainly not in shape; I had a little belly an even less muscle tone.
I started running because it was "cheap cardio" and it was something where I could see weekly progress in both my speed and distance. About 7 months after I started running, I ran a half-marathon in 1:40. 7 months after that I was training very well toward a 3:30 marathon and, despite blowing up on race day, I ran a sub-4:00 race. I believed that the faster I could run or the more weight I could lift (which has never been that much) had a direct correlation to how HEALTHY a human being I was. As of today, I'm not sure I'll go the grave believing that and that's not my belief as I'm writing today.
I've been bitten (and some would probably say infected) by the Paleo/Primal bug. There are varying flavors of the concept, but the version I'm embracing is that we (human beings) have deviated too far from our very-recent ancestry in both lifestyle and diet. As brief lesson in human pre-history, consider that the split in the genetic code we carry (vs. either extinct lineages or apes) occurred about 2 million years ago and the principles of natural selection (evolution) gave us a pretty rockin' person heading out of the Paleolithic into the Meso/Neolithic about 10,000 years ago.
Some anthropologists argue that this was the pinnacle of human health. Few anthropologists disagree that the health of the average human took a nose-dive in the Neolithic. Current studies are projecting that for the first time in recorded history the current generations of Americans are likely to have a shorter average life expectancy than subsequent generations.
I have always been a staunch believer in Science and logic as being able to provide answers to problems. As I have continued to read more about the status quo of our society and compare it to what we know (and in some cases what we presume to know) about what Humans are truly evolved to be/eat/do, I have started taking a hard look at how I'm going to choose to live my life and, with my own personal exceptions that come from living a 21st century life, I'm choosing to pursue a more ancestral path. My hope is that I can find the time I've had today (yay vacation day!) to go more in-depth about what I'm doing and, more importantly, why I think it's right.
To this day, I'm not sure what I did wrong last September. Maybe I brought a wine for dinner that didn't pair as well with the meal as I'd promised. Maybe I didn't pledge enough to VPR during their fall fundraising drive. Maybe they're just sadists and I'm that "sucker born every minute." Whatever the reason, my Bro- and Sis-in-Law felt compelled to talk me into signing up for the New England Tough Mudder at Mt. Snow on 5/5/12.
If you've never heard of the Tough Mudder (or Spartan Race), spend the next 1:45 watching the lead-in video here: http://toughmudder.com/
Having run a marathon in 2011 (and not planning on doing THAT again any time soon), I was looking for a good challenge to keep me motivated through the winter going into 2012. So, like a good sucker, I bit. I registered.
I was ready for something new, something that didn't involve following a strict running schedule for months on end. My wife decided she wanted to try P90X2, so we committed to starting that in the New Year. The workouts looked pretty intense and, at the very least, they would start putting some much needed meat on my upper body. We rocked the first two phases and lost steam (me more so than her) with what really seems like a gimmicky final stage that I plan to blog about in the near future. Regardless, I actually started getting some upper body strength!
We decided our team name for the event would be "When Pigs Fly!" since for about half of us, that was our response when we were asked if we'd like to do the event. We had a handful of good group training exercises where we'd run up/down, crawl under/over, jump over/on/off, lift, throw, carry, climb and drag various and sundry things around our neighborhoods to whip each other into shape.
In hindsight, we should have met at the bottom of the appropriately-named Cliff St. in Burlington every Saturday, jumped into Lake Champlain, and then simply run up & down that stupid hill until we were on the verge of paralysis. Then we could jumped back into the lake, find a boat anchor, gnaw through the rope, and carry it up & down Cliff St a few more times just for good measure.
I went into the event knowing I was in the best overall shape I've ever been in, but also knowing that getting my upper body improved came at the expense of running conditioning. I could still knock out 7 miles without a problem, but the P90X2 program focused only occasionally on the lower body and I knew that I was somewhat down in lower body strength & power from the fall. My cardio was still strong and I admit now that I overestimated the benefit that cardio conditioning would have for this event.
We had a pretty decent early May day for the event; 50s and mixed sun & clouds with an occasional light breeze. I'm sure the breeze was lovely for the spectators, but constantly jumping in & out of 38F water and encountering a "gentle breeze" was far from pleasant. The best part about the mud-caking on your clothing was that it was a temporary (but hefty) wind block.
The gist of the event seemed to be to run the participants up & down blue-square ski trails for about 6 miles while occasionally giving you a "rest-break" with an obstacle that would either soak you or cover you in mud. You got to confront many common fears -- heights, drowning/water, claustrophobia/darkness, electrocution, roundworm, fire, hypothermia. Some obstacles incorporated several at once, such as the "Electric Eel," a scramble-on-your-stomach crawl through several inches of water through a myriad of wires, some of which would occasionally deliver 10,000V electric shocks.
Leading in to the event, for over a month I've been fighting a losing battle against calf cramping during some of my longer runs. It's been something that'll come & go, but they've been pretty mild and have worked themselves out before causing me to stop mid-run to address it. I fought these cramps in the latter stages of my marathon run, but rarely encountered this at any point in the past. Before we hit mile 2 in the race, I knew I was going to have issues before the event was done.
What I didn't know is that I'd be dealing with various calf & quad issues for about 2/3 of the event. Before Mile 3 (out of 10), my calves were starting cramp whenever I wasn't running/hiking. This was good incentive to keep moving, but for a while, any obstacle that involved crawling or jumping (i.e. all of them) was done with limited leg assist. Crawling through tubes/mud/water with limited propulsion from your legs sucks, especially when your primary goal is to GET THE HELL OUT OF THIS THING NOW!
The calf knotting was more annoying than painful and more had the effect of trying to move around when your leg has fallen asleep -- you can move around, but the leg is pretty useless and you're a little gimpy-looking. Somewhere around Mile 6, we were bombing down a steep slope and I felt an all-too familiar twinge in both lower inner quads. In my first Half Marathon (Fall 2010), I started getting cramps around mile 10 out of 13, but was able to run through it and they went away. A few weeks ago during training, I was doing a lot of leg work and had my left quad completely seize up.
As I continued to bound down the mountain, the trail detoured to the right into the woods on a muddy/rocky/rooty single-track "trail" (and I use that term VERY loosely). I paused briefly to check where my team was behind me and felt both legs start to lock. Decision time: stop now & address it or press on and see if, like the calf cramping, the quads would work themselves out. Giddy-up, let's run. On with the show!
It didn't get any better. After several minutes of traversing the mountain on this mucky track I found a relatively dry area and pulled off the side and both quads instantly & completely locked. While squatting, the knots in my quads would quickly subside, but as soon as I stood up, they immediately returned. I couldn't navigate the terrain on tin-man legs, so we had let the world pass us by while my mind attempted to convince my body to STFU and get on with the program. My team-mates (I don't even remember who at this point!) tried a bit of deep-tissue massage and suggested some stretches which helpled, but the only thing that got me back up and on the train was a couple minutes of rest, relaxation, and deep, calming breaths.
In many ways, my struggles during the marathon last May was probably the best training experience I had for this event. Knowing how to manage your body when Plan A and Plan B have gone out the window and knowing that you can grit through the pain and discomfort and FINISH is a huge motivator to keep putting one foot in front of the other. I had an AWESOME team and there wasn't a single person who was going to let any other member fail to get through the course. While I personally felt like crap that my conditioning fell apart, I couldn't have asked for a better group of people to be with for the day.
At the end of the day, we got our lame orange TOUGH MUDDER headbands and lousy Dos Equis draught to mark our successful completion of the course. At the end of the day, we all were cold, wet, muddy, bruised, scraped, sore, exhausted, and relieved. At the end of the day, we all faced obstacles, both physical and psychological that we said we'd do willingly, "When Pigs Fly!" On a lovely Cinco de Mayo in Southern Vermont, for about 4 and half hours, there were seven pigs flying up & down Mount Snow...and Piggy makes 8.